
Managing Your WooCommerce Website
Common questions, tips and tutorials.
We have put together a list of FAQ’s of the most common things we are asked when managing your WooCommerce website. Of course if you don’t find the answer here please call the team.
WooCommerce FAQ’s
How do I add a Simple product?
To add a Simple product. you’ll need:
- Product name
- Product’s regular price
- Product image (from your Media Library)
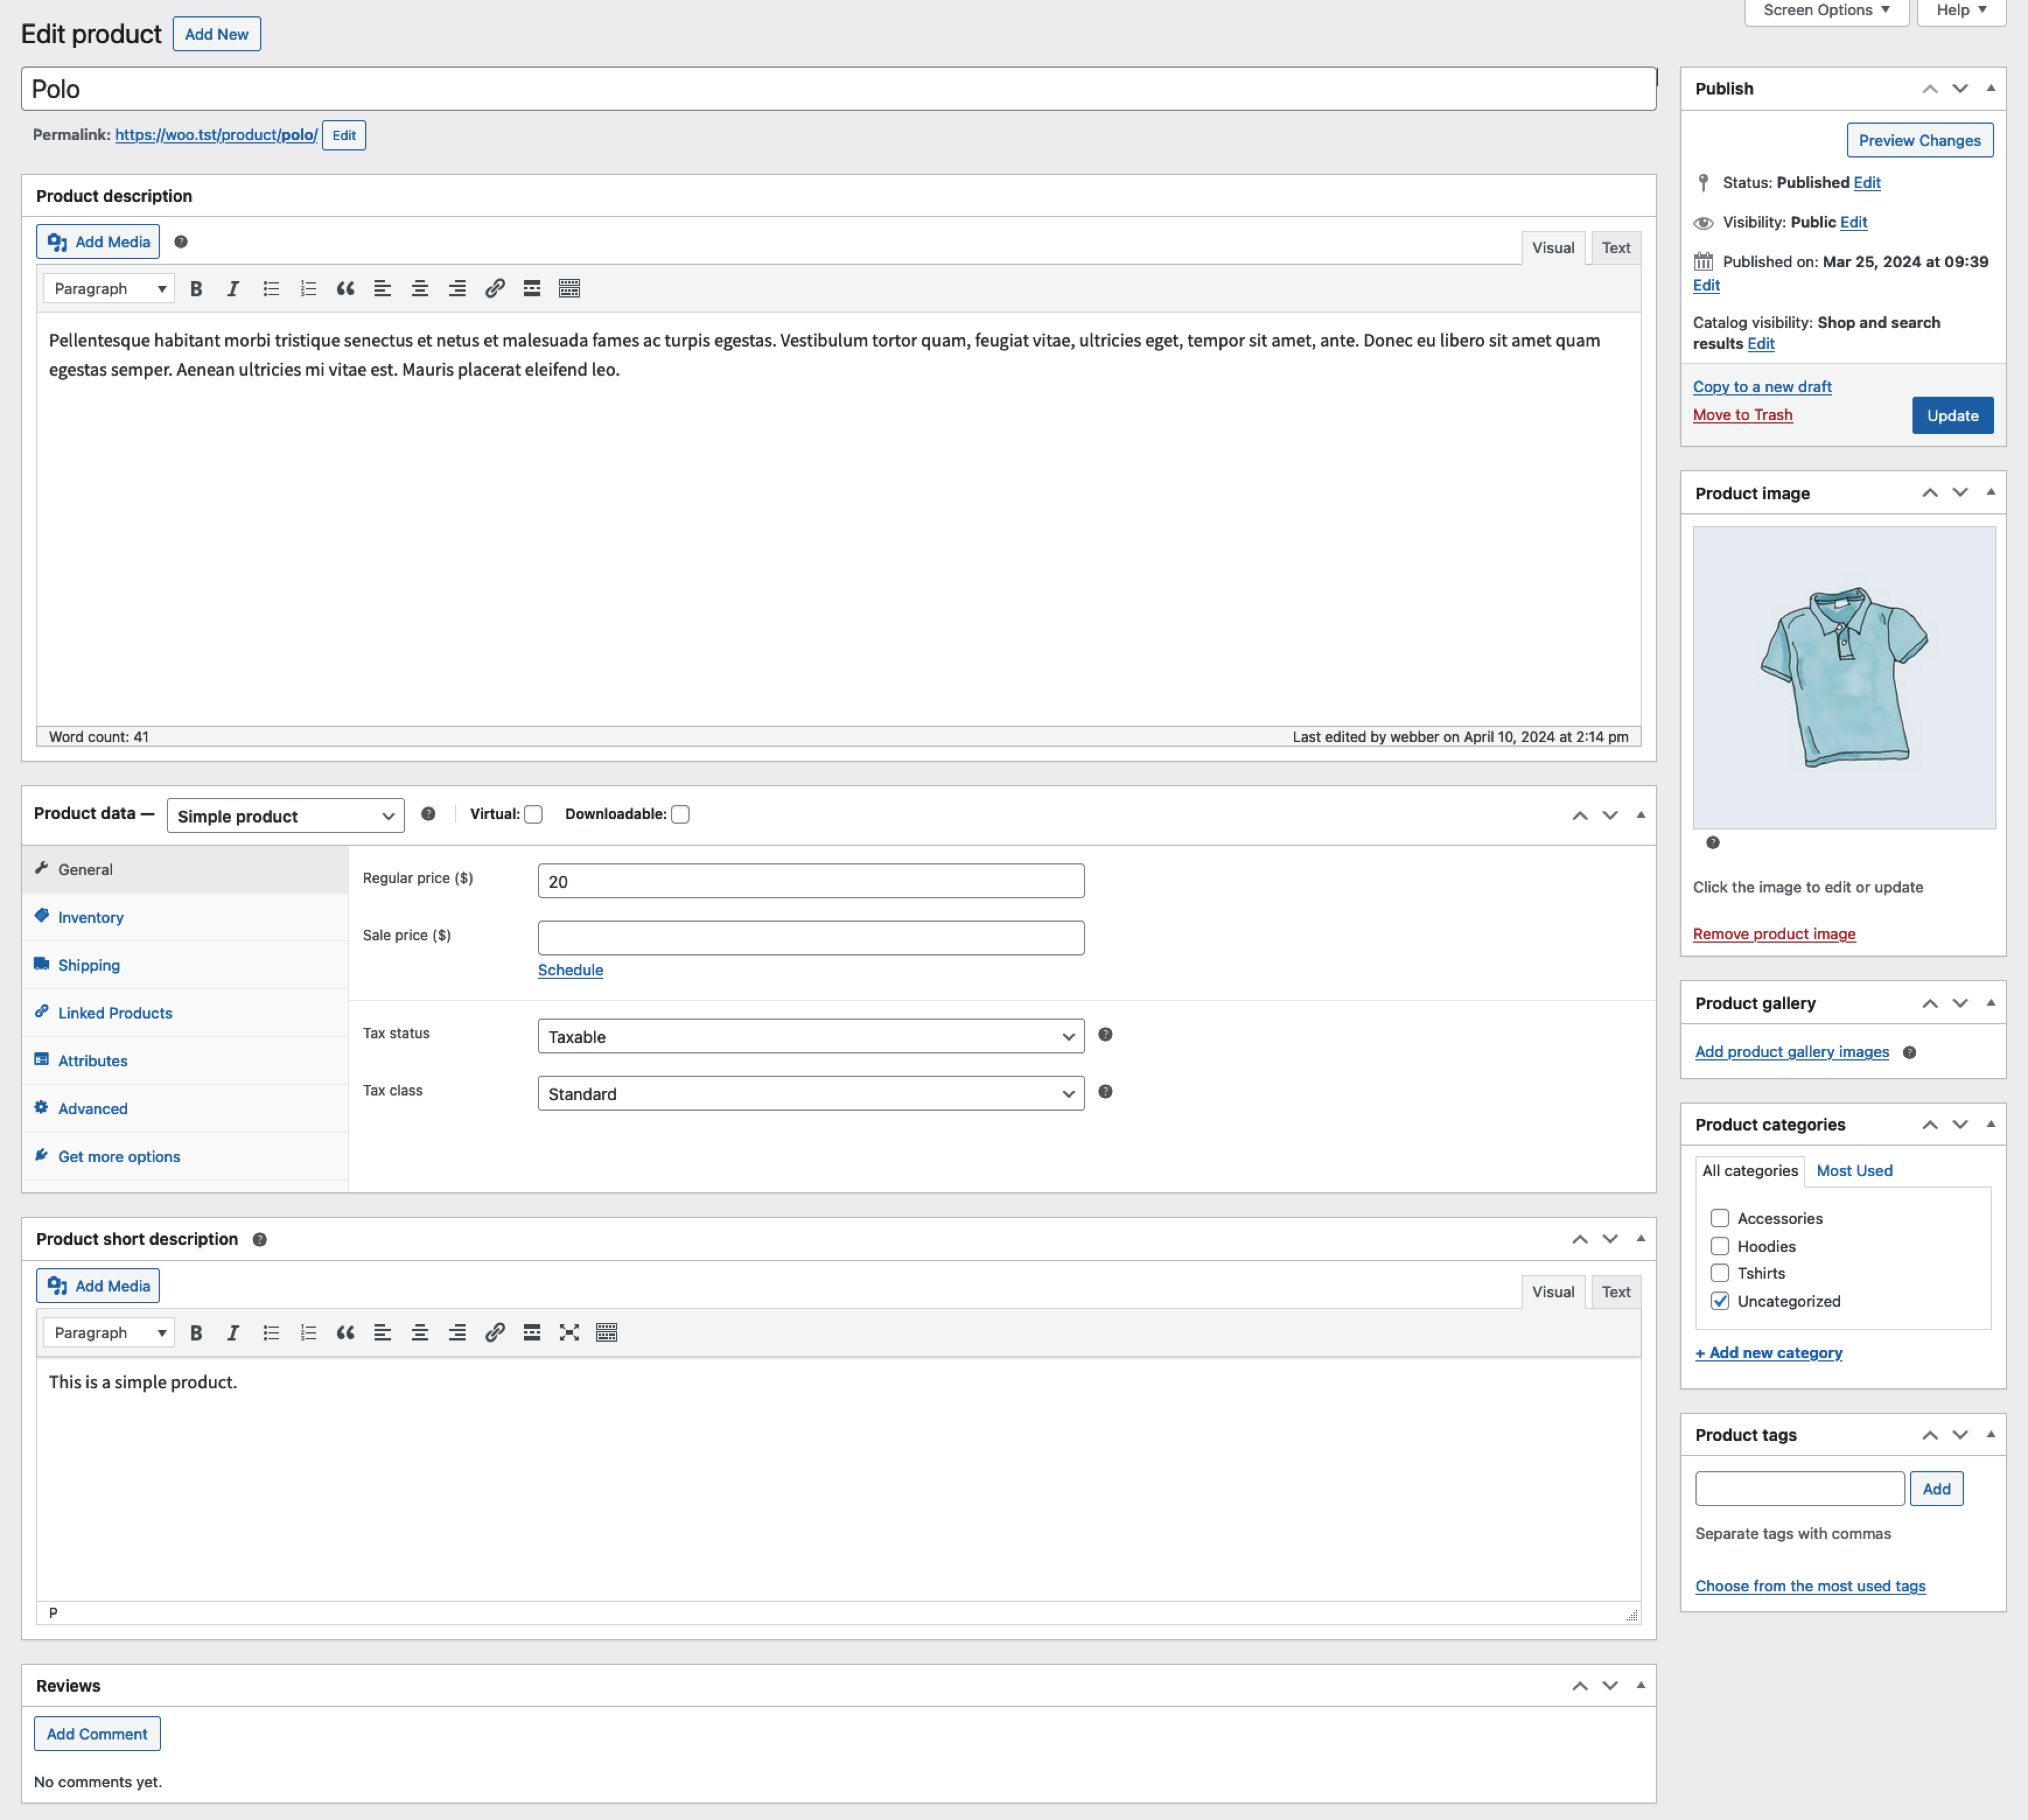
The following example results in a basic product listing, without a description, assigned to the default “Uncategorized” product category:
- Go to WooCommerce > Products > Add Product.
- Enter a Product name.
- In the Product data > General section, the Product type should default to Simple product.
- Enter an amount in the Regular price field.
- In the Product image panel in the right-hand column, click the Set product image link.
- Select the image you want to use and click the Set product image button.
- Click the Publish button in the Publish panel.
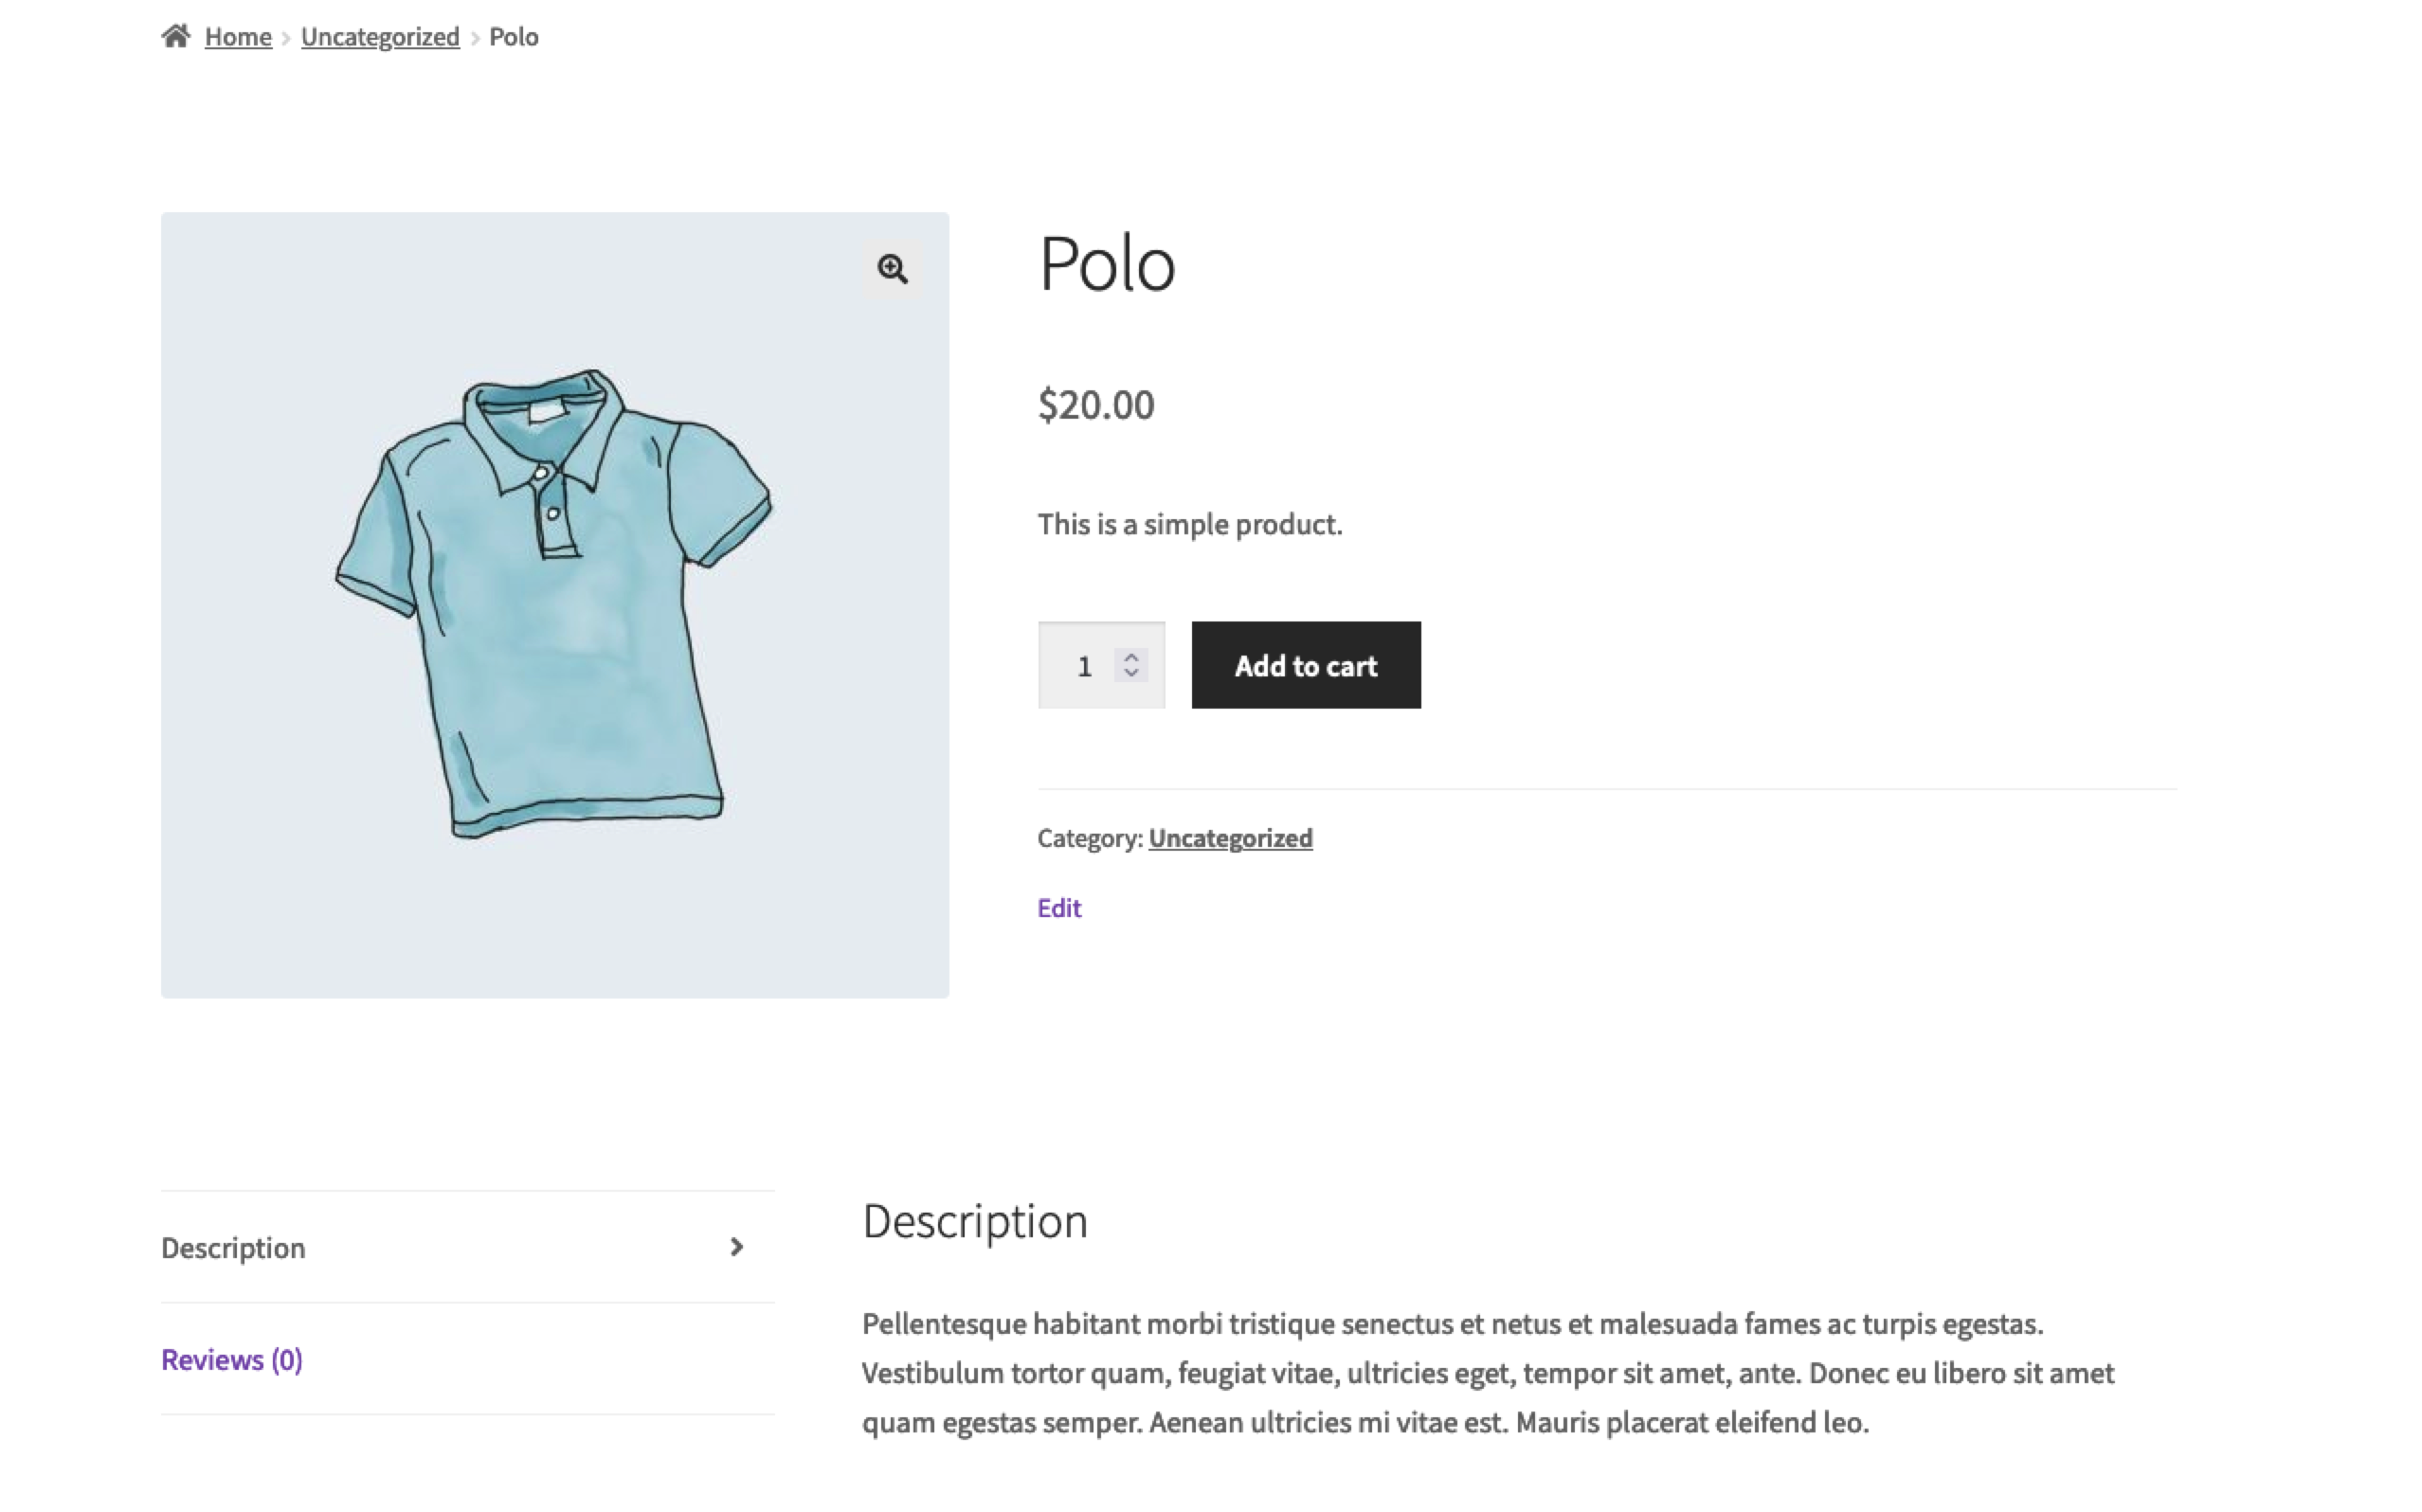
- Click the View product link at the top of the screen to view the newly created product.
This is what the example product looks like to customers
How do I add a Variable product?
Variable products in WooCommerce let you offer a set of different options on a product, with control over prices, stock, image, and more for each variation. You can use them for a product like a t-shirt, which you can offer in large, medium, and small sizes, all in different colors.
Here you’ll learn:
- How to create a variable product in WooCommerce.
- How to add global or custom attributes to your variable product.
- How to use product attributes to create different product variations.
- How to define a default variation for a variable product.
- How to sort and organize product attributes and their options.
- What data you can add to a product variation and how to add it.
- Different inventory management options for variable products.
- How to bulk edit all variations of a product.
- What customers see on the front end of your site when you use variable products.
Adding a variable product is similar to adding a simple product, but with a few more details to consider.
To add a new variable product:
- Navigate to “Products” in the site’s admin area.
- Click Add New Product at the top of the page.
- Enter the product name.
- Choose “Variable Product” from the “Product data” dropdown menu.
- Click on the “Attributes” tab on the left hand side under the Product data dropdown.
- Add either a global/existing attribute or create a new one( specific to the product):
- Adding a Global Attribute:
- If you’ve already created global attributes, select the one you want to use from the “add existing” dropdown menu at the top of the settings.
- Select the variations/values you’d like to use from that attribute. You can add them all by clicking the “Select All” button below the values box or you can select specific ones you want to use by clicking on the “Select Values” box and selecting them one by one.
- Adding a new Attribute:
- Click the “Add New” button at the top of the settings.
- Add a name for your attribute (examples: size)
- Add the values (variations) you need. Separate each variation/value with | (i.e.: Medium | Large | XL | XXL )
- Adding a Global Attribute:
- Click “Save Attributes”.
- Click on the Variations tab on the left.
- Click either:
- Generate variations to add all possible variations from all attributes values/variations.
- Add manually to specify which variables will be available for the product.
- Click on each variation to expand to its product menu.
- Enter product information: Price, stock status, weight, dimensions, shipping class, and description. Add Linked Products if needed. Repeat for all variations.
- Optional: Use the “Bulk Actions” dropdown at the top of the “Variations” menu to set product information for all variations at once.
- Click Save changes at the bottom of the variations menu.
- Click “Publish” in the top right of the screen to publish the product.


Make sure to check the “Used for variations” box and save your added attributes.
Adding Variation Data
Each variation can have the following properties:
- Image – Click the placeholder to add an image of the variation. See below
- SKU – Enter the SKU or leave blank. Note: If you set an SKU at the product level but leave it blank at the variation level, SKU will default to product level SKU.
- Enabled – Enable or disable the variation.
- Regular Price (required) – Set the price for this variation. Variations without prices don’t show in your store.
- Sale Price (optional) – Set a price for this variation when on sale.
- Manage Stock? –
- Stock quantity – if selected. Allows to set the current stock level for the variation.
- “Allow backorders?” – Enables allowing backorders for the variation; if enabled, stock can go below zero.
- Low stock threshold – When the stock for the variation reaches this level, the system will send you a notification email. You may need to check with web Wizards to see if it is configured.

How do I update stock levels for products?
- Go to Products > All Products in your dashboard.
- Click Edit on the product you want to update.
- Under the Inventory tab, update the stock quantity.
- Save your changes.
How do I process customer orders?
- Go to WooCommerce > Orders in your dashboard.
- Click on an order to view details.
- Change the order status (e.g., from “Processing” to “Completed”) after fulfilling it.
- Add tracking details or notes if needed, and click Save Order.
Can I offer discount codes or coupons?
Absolutely! To create a coupon:
- Go to Marketing > Coupons and click Add New.
- Enter a coupon code and description.
- Set the discount type (percentage, fixed amount) and restrictions (e.g., minimum spend).
- Save the coupon and share it with your customers.
Got Questions?
talk to us or contact us.
Please fill out this and we will get back to you shortly.
Otherwise, you can also contact our support team on (08) 9350 9392 or send us an email at solutions@webwizards.com.au